Wednesday, November 14, 2012

Lace Scarf

This was one of the very first things I found when I first became a Pinterest addict.  (see me on Pinterest here!)
however, the link to the post goes to some other page that has no post or suggestion on how to make this lovely thing! My style is very Grandma, as I so lovingly refer to myself, and this piece would be great to add to the mix for the winter months. I decided to take it upon myself to learn how to make it! (and thusly share with you!)

I had acquired a lace cardigan from Goodwill, which i had hoped to revamp and wear on its own, but it was just a little too off, too big, too frumpy, too ... not right. so I decided to use the cardi as material and cut it up!
[cardi, hanging on the back of a chair in my craft room. sorry i don't have a better 'before' picture!]
 To make the gray part of the shirt, I decided to use a white tshirt I had. The top of the shirt had a logo on it, and a stair from hair color, but the bottom half of the shirt was good! I just cut that sucker in half to make one big loop, cutting from just below the boobs off!
Then, I needed to splice in a lace piece to get the desired effect. I decided to cut one of the front panels off of the cardi. I cut it along the side seam, up to the armpit, and when I got to the armpit I cut a straight line to get a square piece. [see below]
Then I lined up my lace piece with my tshirt piece, which was longer, and i decided I needed to cut some off to make them the same length. 
Then I lined the pieces up inside out, and ran them through the sewing machine with white thread. The sewing part was easy!

And here's the finished product, via Instagram! (over my Beauty and the Beast tshirt!)
Part of me wishes I'd done it with a different color for the shirt, so the lace would stand out more, but it makes it easier to accessorize with an all-white scarf and makes the lace pop just a little! I'm really happy with my decision!

Amy

Friday, November 9, 2012

My Ol' Kentucky Home

I Found a project that I really wanted to try:
Louisiana Love // Reclaimed Wood Nail and String Art Tribute to The Pelican State
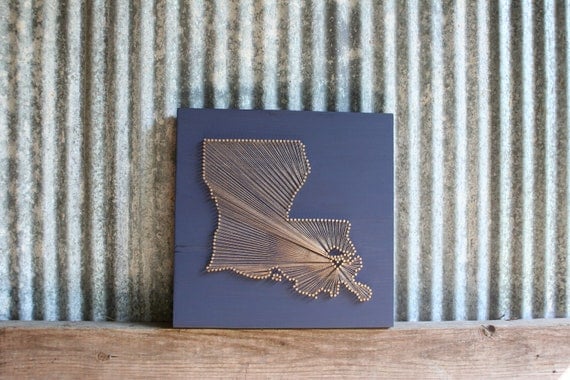
*Here's the item for sale on etsy*

I knew hands-down that I'd want to do this with Kentucky, since I've lived here my whole life, and I knew I'd want to make my wood background blue ("Kentucky Blue", as we call it).

The project seemed pretty self explanatory - wood (painted), nails, string, done. And no offense to said Etsy seller, but I thought I could make my own for less than $110.

First I bought a pre-cut, pre-sanded board from Michaels. Less than $5. I bought a small bottle of acrylic paint in the color I wanted as well, $1 approx. Then, knowing the size of my board (which is about 10"x13"?) I printed off an outline of the state of Kentucky - via Google search - and cut it out. Quite resourceful here.

I then used just your average small silvery picture nails, of which I had plenty, and started hammering in the outline. I used it as a pretty close guide, and did the major points first instead of just going for it all the way around right away. This way if I got really crooked or something, I'd have a reference point to get back on track. 

Below is my completed outline! It was pretty tedious, but I was really happy with the outcome. It's not exactly snug to the printout I had, but it's close enough that you can tell what it is. I had also already started putting in the heart for the center. I live in Central KY pretty much, so I made the heart close to where I live. Made sense.

 Here you can see the completed heart.
Now all I had to do was string the whole thing together. I knew I wanted to use white string, but wasn't sure what thickness to use. I had actually bought some twine, because I love more rustic-looking things, but after I put all the nails in I thought it would probably be too thick to use. I had to use something though, so I grabbed a spool of white thread out of my sewing basket and got started. I tied a good solid knot around one nail, and went to town! Looped from one outside nail, around one on the heart, back to the next outside nail, back to the inside, etc. Of course, the ones on the heart got a lot of repeats, but that's what makes it look so cool!
The finished product

And here it is, hanging on my apartment wall! (Unfortunately a little crooked, or my phone was...)
After I got it all strung, I did take a scrap of sand paper and rough up the wood's edges a little, since my paint job was showing some imperfections, that way it looked deliberately worn!
Very proud that I accomplished this one! Cost: I paid about $6 for supplies, but I already had the nails and thread. If I'd had to purchase everything, it would have been around $10. it was a great project!
Amy

Tuesday, November 6, 2012

Fall-Tober

Just a quick post tonight. I am in charge of the bulletin board at work this quarter. My whole department is but I'm the only one who gets excited about this kind of thing. I took a few different ideas from Pinterest (of course!) to put it together.

I really like the cute and colorful paper pennants I've seen on Pinterest... something along these lines. I made some out of construction paper and white poster board, and wrote "trick or treat" on them w Sharpie. I taped some Dollar Tree twine on the back. Presto!

Then I decided to make a wreath too. I like the fun of Halloween but I don't like the scariness of it. I wanted to do a cute version for my bulletin board! I found an idea I liked by searching "trash bag wreath" on Pinterest (duh). Took me a while to find a tutorial but I did. (this isn't the exact one i used, but it'll get you pretty close!) For my wreath frame, I used a WIRE HANGER and pried it open to a circle, leaving the hook to hang it from!! Genius, huh! (found that idea HERE from one of my favorite blogs! Shout out to A Beautiful Mess!)

Instead of using trash bags (expensive!) I used a black plastic tablecloth! From the dollar tree. I cut it into about 1"x8" strips (hint: leave it folded!) and just tie them on. Then I made a bow from crepe paper.

I also used another plastic tablecloth as the backdrop on my bulletin board. I spray painted some twigs from my parents' yard black. And I printed out pictures from Halloween movies and put them around the bottom. Oh yeah, and a bag of cobwebs!!

Amy

Saturday, November 3, 2012

DVD Storage Shelf

We don't have cable or internet in our apartment - call us crazy - so we watch a LOT of dvds. We borrow, we Redbox, we search the $5 bins at walmart... but we always have dvds laying around. We quickly ran out of shelf space and outgrew crates and even piles on the floor. Too much! I searched Pinterest and looked for lots of different ideas that may support our ever-expanding collection. This was the one that was closest to what I thought we could use.

This one was made on the backside of closet doors, which we didn't have in our living space, but we do have some wall space and I have access to power tools. This felt do-able.

I got the materials and took them to the theatre, where I work/volunteer when i have time. I used 1"x6"x10' for the sides and the shelves, and one sheet of plywood for the backing. I thought about using it at it's full size, but I ended up shaving off about a food on the side so my total shelf was about 3' wide. I made the space between each shelf about 8" tall i believe - I wanted enough room to stick a finger in to pull a dvd out, but not much extra.
 We selected a Rust-oleum stain called "Cabernet". I liked the color and the name both. I had never actually stained any furniture myself, but I'd seen it done enough that I thought "surely I can handle that!" It was NOT too bad, really. Nick and I worked on it together, it took a little longer than I wanted, but after two coats I was done! 
(Picture below only has one coat on)
 Below is the shelf in the apartment, without the dvds on it yet.
 Shelf with our current dvds! (as of July. Our collection looks totally different now!)
It also makes a great place to store knick-knacks, candles, pictures.... some of those little things that i never have a place for! which is perfect.
Such a great investment for our apartment! It was really pretty easy and we look at it every day. I'm very proud of it!

Saturday, October 27, 2012

Sanibel shells, part 1

As we returned from Sanibel island this summer I brought back a bucketful of sea shells- hoping I'd develop the craft projects for them. Within the first week after our return I came up with the first project.

I'd had this frame for a few years but it never seemed to match my other decor, though I loved the recycled feel of it.

I had a bottle of good ol acrylic paint, in an oatmeal color. I coated the frame twice.

Then I started laying out some of the shells. I just wanted a variety to provide a sampling of some of the gorgeous shells I collected. It was really hard to decide which ones to use, because they are all so beautiful!

Lastly I selected a picture from the trip, matted it with some scrapbook paper leftovers, and voila!

Genesis

This is new. I used to blog a lot, on a variety of sites, but haven't done anything of the sort in a long while. It was suggested by a dear friend that I create a blog to share some of my craftables with the world. Many projects are already complete but many more ideas come up each day! A lot of it is not my own concept, but is pinspired. Please comment and share!

Amy